
Installing a stair lift is one of the most effective ways to improve home accessibility and support safe mobility for seniors and individuals with limited movement. Many homeowners researching stair lift installation want clear answers about cost, requirements, and whether their staircase is compatible.
This guide explains everything you need to know about stair lift chair installation, from measurements and electrical setup to maintenance and repair considerations. Whether you are planning for aging in place or helping a family member, understanding the installation process helps you avoid costly mistakes.
You will learn how installation works, what affects pricing, and how to choose the right setup for your home. For a broader overview of models and features, explore our stair lift guide. You can also review pricing factors in our stair lift cost guide and compare manufacturers in our best stair lift brands guide.
Table of Contents
- How Stair Lift Installation Works
- Can It Be Installed On Any Staircase?
- Measurements Required
- Electrical Requirements
- Installation Timeline
- DIY vs Professional Installation
- Common Mistakes
How Stair Lift Installation Works
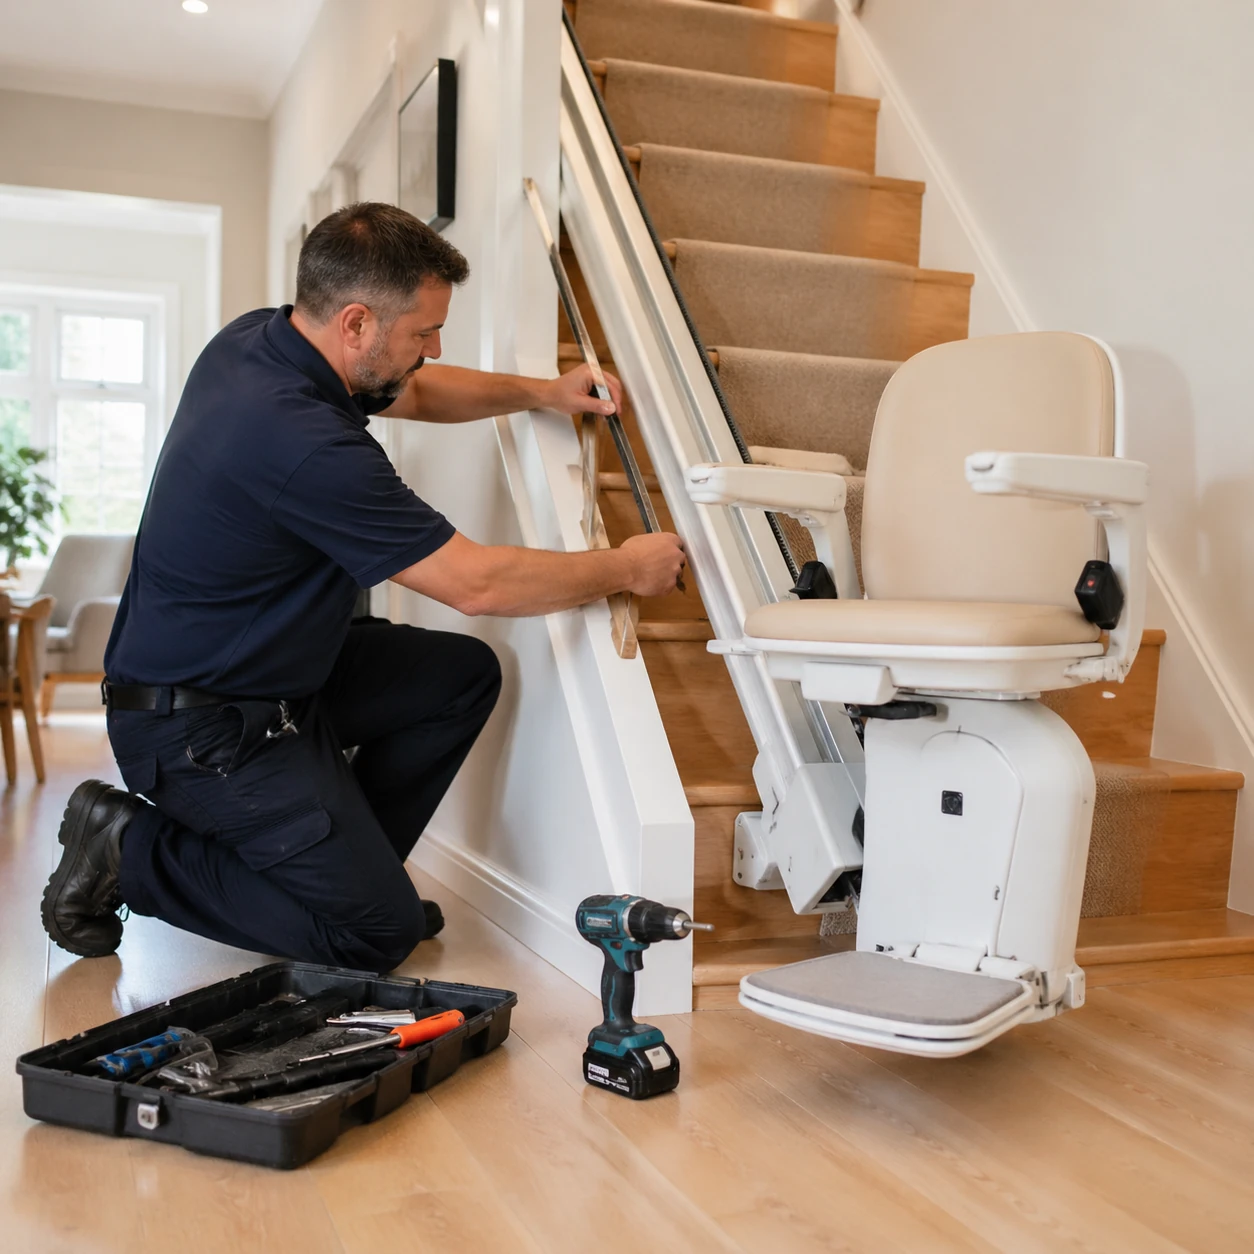
Understanding how stair lift installation works is essential before choosing a system for your home. A modern stair lift is installed directly onto the staircase using a rail system, not the wall. This reduces structural changes and makes installation faster and more efficient.
Most stair lift chair installation projects follow a structured process that includes measurement, rail fitting, chair assembly, and safety testing. The entire system is designed to provide smooth, safe mobility while supporting long-term home accessibility.
Step-by-Step Installation Process
A professional stair lift installation typically follows these steps:
- Initial home assessment and staircase evaluation
- Precise measurement of stair length and angles
- Custom or standard rail preparation
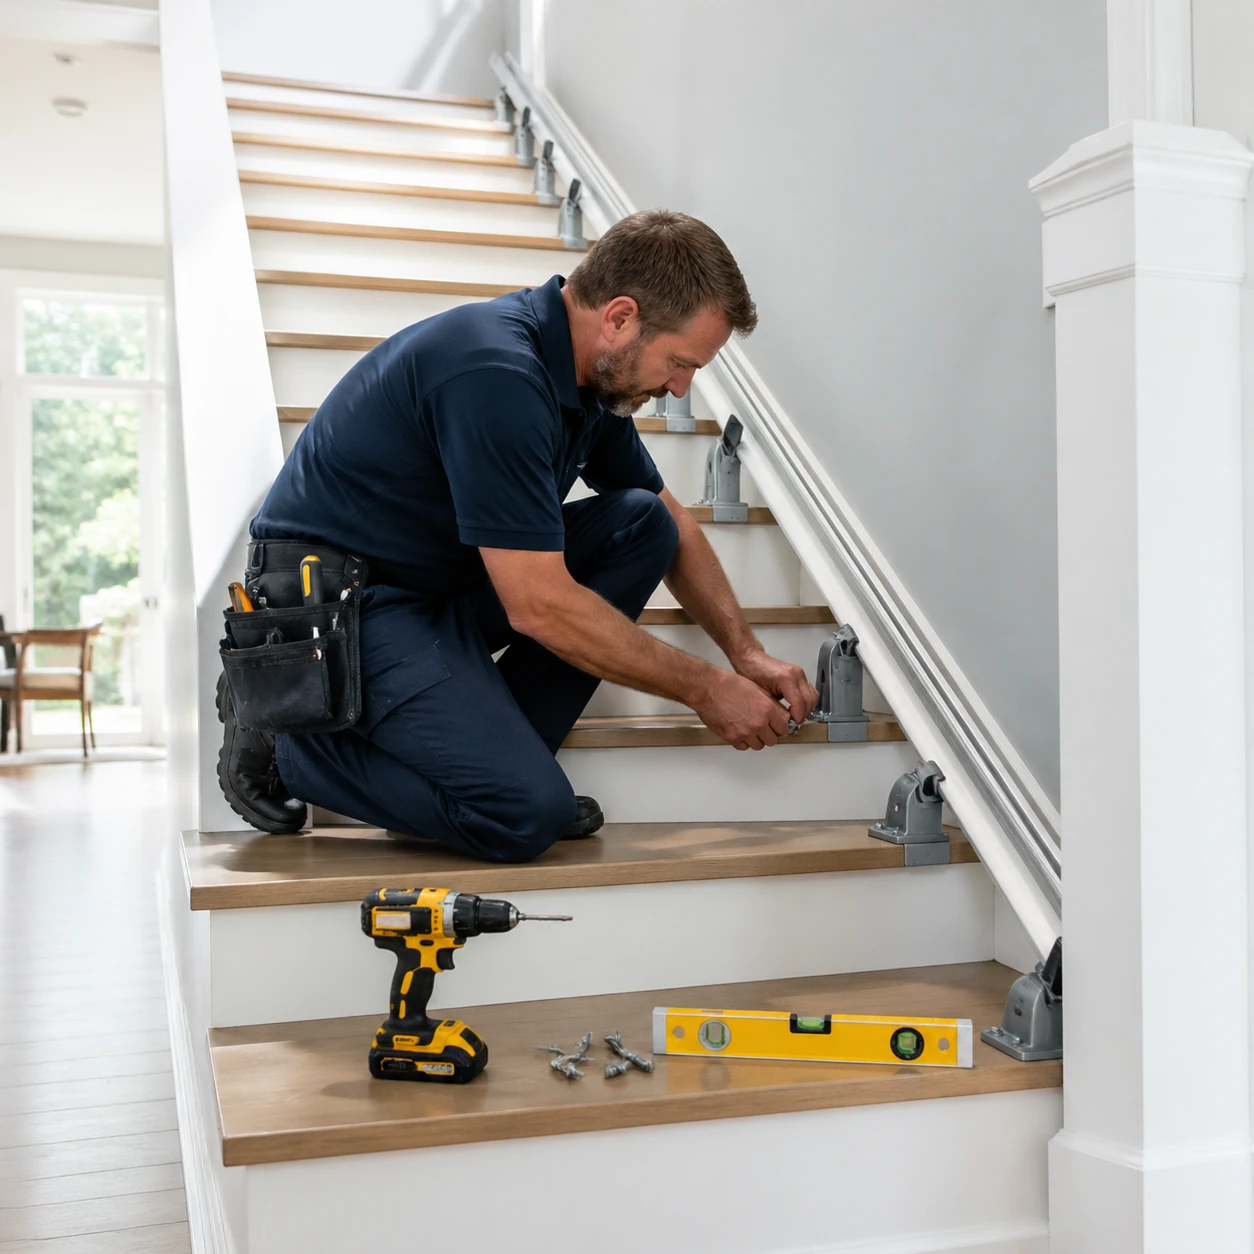
- Mounting the rail securely to stair treads
- Installing the stair lift chair and motor system
- Connecting power supply and battery charging unit
- Testing safety features such as sensors and seat belts
- Final user demonstration and safety instructions
Each step ensures the system meets stair lift installation requirements and operates safely under daily use conditions.
Main Components Installed
A stair lift system includes several key components that work together to deliver a smooth ride:
| Component | Function | Installation Role |
|---|---|---|
| Rail (Track) | Guides the chair along the staircase | Mounted directly to stair treads |
| Chair Unit | Supports the user during travel | Attached to motor carriage |
| Motor & Drive System | Moves the chair up and down | Integrated within base unit |
| Battery System | Provides power backup | Connected to charging points |
| Safety Sensors | Detect obstacles and stop movement | Installed on footrest and carriage |
| Controls | Operate the lift (remote or armrest) | Configured during setup |
Why Stair-Mounted Installation Matters
One of the biggest advantages of stair lift chair installation is that the system is fixed to the stairs rather than the wall. This approach:
- Avoids major structural modifications
- Works in most residential homes
- Reduces installation time significantly
- Allows removal without major repairs
This design makes stair lifts one of the most practical mobility aids for aging in place.
Professional Setup vs Real-World Use
Although installation may appear simple, correct alignment and calibration are critical. Poor installation can lead to:
- Uneven movement along the rail
- Increased wear on motor components
- Safety sensor malfunctions
- Higher long-term stair lift repair costs
This is why most homeowners choose professional installers instead of attempting DIY setups. Proper installation ensures long-term performance, safety, and compliance with accessibility standards.
If you are comparing systems before installation, review our best stair lift brands to understand how build quality affects installation and long-term reliability.
Can It Be Installed On Any Staircase?
One of the most common questions homeowners ask is whether a stair lift installation can work in their specific home. The short answer is yes in most cases, but the exact solution depends on staircase design, available space, and structural layout.
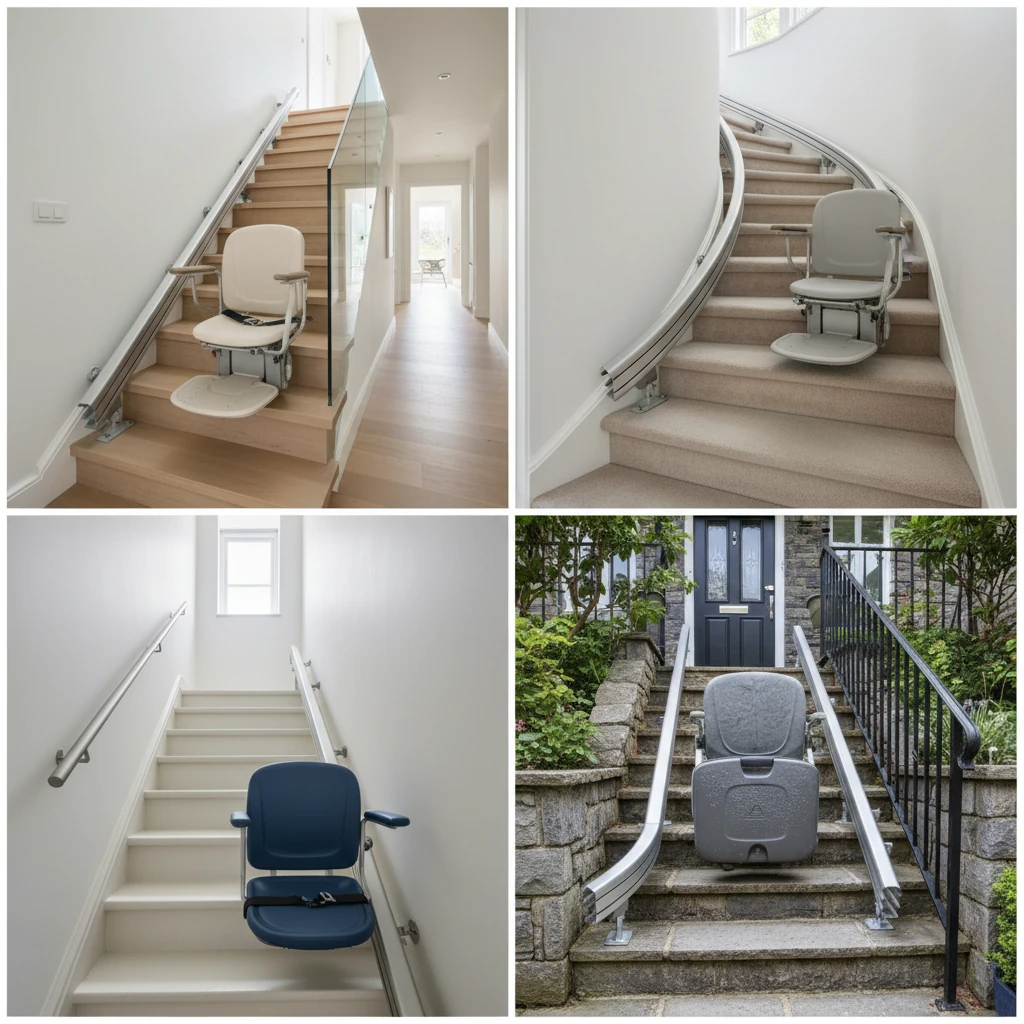
Modern stair lift chair installation systems are designed to adapt to different environments, including straight, curved, narrow, and even outdoor staircases. However, understanding the limitations and requirements helps avoid installation issues later.
Types of Staircases Supported
Most stair lift systems can be customized to fit the following staircase types:
- Straight staircases with no turns or landings
- Curved staircases with bends or intermediate landings
- Spiral or complex stair layouts (custom solutions required)
- Narrow staircases with space-saving designs
- Outdoor staircases exposed to weather conditions
Each type requires a different rail design and installation approach. Straight systems are simpler, while curved systems require custom-built stairlift rails.
Straight vs Curved Stair Lift Installation
| Feature | Straight Staircase | Curved Staircase |
|---|---|---|
| Rail Type | Standard straight rail | Custom curved rail |
| Installation Time | Few hours | Several hours to full day |
| Cost Level | Lower | Higher |
| Complexity | Simple | Advanced engineering |
| Customization | Minimal | Fully customized |
Space Requirements and Limitations
Even though most homes can support a stair lift installation, certain space requirements must be met:
- Minimum staircase width (usually around 70–75 cm)
- Enough clearance for folded chair and footrest
- Safe entry and exit points at top and bottom
- No permanent obstructions blocking the rail path
For tight spaces, compact models or folding rail systems can improve usability without compromising safety.
When Installation May Be Challenging
Some staircases require additional planning or modifications before installing a stair lift:
- Very narrow or steep staircases
- Irregular step heights or damaged stairs
- Obstructions such as doors opening onto stairs
- Limited landing space at the top or bottom
In these situations, professional assessment ensures the system meets stair lift installation requirements and operates safely.
Outdoor Stair Lift Considerations
Outdoor stair lift chair installation is also possible, but requires weather-resistant components:
- Waterproof covers and sealed electronics
- UV-resistant materials
- Anti-corrosion rail systems
- Reliable battery performance in cold conditions
These systems are designed for durability but may require more frequent stair lift maintenance.
Expert Insight
According to accessibility guidelines and organizations such as ADA and NCOA, adapting a home with mobility aids like stair lifts significantly improves safety and independence. Most homes can accommodate a system with proper planning and measurement.
If you are unsure about your staircase type, reviewing options in our stair lift guide can help you understand which model fits your home. You can also compare system quality in our best stair lift brands before making a final decision.
Understanding compatibility early helps prevent redesign costs and ensures a smoother installation experience.
Measurements Required
Accurate measurements are the foundation of a successful stair lift installation. Even small measurement errors can lead to poor fit, unsafe operation, or costly adjustments during installation.
Before any stair lift chair installation, professionals carefully measure the staircase to ensure the rail system fits perfectly and operates smoothly. These measurements determine rail length, angle, and mounting positions.
Key Measurements Needed
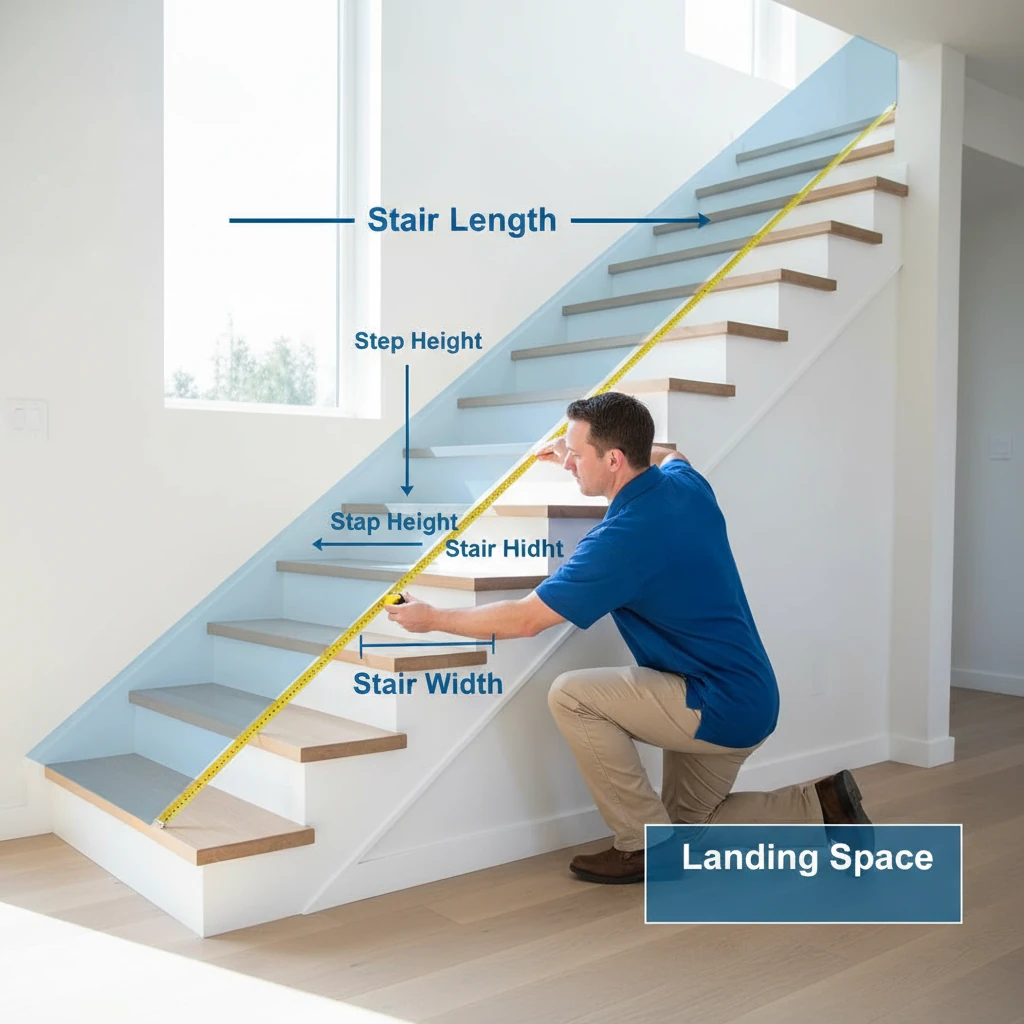
To meet proper stair lift installation requirements, installers collect several critical dimensions:
- Total staircase length from top landing to bottom floor
- Number of steps and individual step height
- Staircase width and available clearance
- Angle or steepness of the staircase
- Top and bottom landing space
- Obstacles such as doors, radiators, or railings
These measurements ensure the stairlift rails align correctly with the staircase and allow safe movement.
How Staircase Length Is Measured
The most important measurement in stair lift installation is the total travel length. This is not measured horizontally but along the edge of the stairs.
- Measure from the top landing edge down to the bottom floor
- Follow the contour of each step
- Use a tape measure or laser tool for accuracy
- Avoid straight-line measurement errors
Incorrect length measurement can result in rails that are too short or too long, affecting both safety and performance.
Stair Width and Clearance
Width plays a major role in determining whether a stair lift can be installed comfortably. Most systems require enough space for both the user and other household members to pass safely.
| Measurement | Recommended Value | Why It Matters |
|---|---|---|
| Minimum Width | 70–75 cm | Ensures safe seating and movement |
| Folded Clearance | Enough for walking space | Prevents obstruction when not in use |
| Landing Space | Adequate turning area | Safe entry and exit |
Angle and Staircase Shape
The angle of the staircase affects motor performance and rail design. Steeper stairs may require stronger drive systems and careful calibration.
- Straight stairs require simpler measurements
- Curved stairs require detailed mapping of turns
- Spiral stairs need custom engineering
This is why curved systems often involve digital scanning instead of manual measurement.
Common Measurement Mistakes
Incorrect measurements are one of the leading causes of stair lift repair issues and installation delays.
- Measuring in a straight line instead of along steps
- Ignoring obstacles like door openings
- Forgetting landing space requirements
- Using inaccurate tools
- Not accounting for future mobility needs
Professional installers avoid these mistakes by using precise tools and standardized measurement methods.
Expert Tip
Accurate measurement ensures smoother stair lift maintenance and reduces long-term wear. Poor alignment can increase stress on the motor and rail system.
If you are comparing systems before measuring, review our stair lift cost guide to understand how staircase complexity affects pricing. You can also explore options in our best stair lift brands to see which models offer better flexibility for different layouts.
Electrical Requirements
Understanding stair lift installation requirements is critical when planning a safe and reliable system. One of the most important factors is the electrical setup. Fortunately, most modern stair lift installation projects do not require major electrical upgrades.
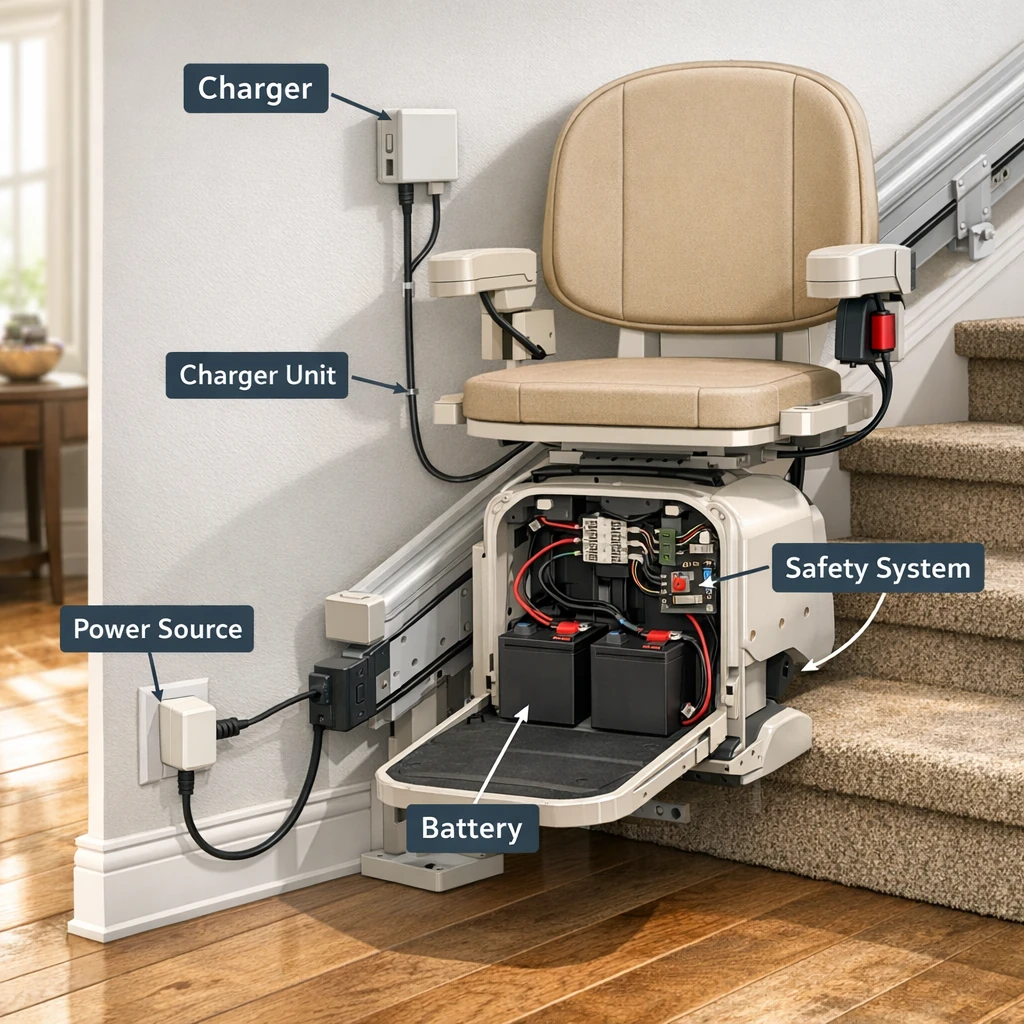
Today’s stair lift systems are typically powered by rechargeable batteries. These batteries charge automatically when the chair is parked at a charging point, allowing the lift to operate even during power outages.
How Stair Lift Power Systems Work
A standard stair lift chair installation includes a battery-powered motor connected to a charging system. The lift draws power from batteries rather than directly from the home’s electrical supply.
- Batteries power the lift during movement
- Charging points are installed at top or bottom of stairs
- The system recharges automatically when parked
- Lift continues working during short power outages
This design improves safety and ensures consistent performance, especially for seniors who rely on mobility aids daily.
Standard Electrical Requirements
Most stair lift installation setups only require access to a nearby power outlet. However, certain conditions must be met:
| Requirement | Details | Importance |
|---|---|---|
| Power Outlet | Standard household outlet near staircase | Provides charging power |
| Voltage | Typically 110–240V depending on region | Ensures compatibility |
| Dedicated Circuit | Optional but recommended | Prevents overload |
| Charging Points | Top, bottom, or both | Maintains battery charge |
Do You Need Electrical Modifications?
In most homes, stair lift chair installation does not require rewiring. However, minor adjustments may be needed in some cases:
- No nearby power outlet available
- Older electrical systems with limited capacity
- Outdoor installations requiring weatherproof connections
- Long staircases needing additional charging points
A professional installer can assess your home and ensure the system meets all stair lift installation requirements.
Battery Backup and Safety
Battery backup is one of the most important safety features in a stair lift. It ensures continued operation during emergencies.
- Allows multiple trips during power outages
- Prevents users from being stranded mid-staircase
- Reduces reliance on constant electrical supply
According to safety recommendations from organizations such as CDC and NCOA, reliable mobility systems reduce fall risks and improve independence at home.
Outdoor Electrical Considerations
Outdoor stair lift installation requires additional electrical protection due to exposure to weather conditions.
- Weatherproof power outlets
- Sealed wiring and connectors
- Protection against moisture and temperature changes
- Regular stair lift maintenance checks
These features help extend system lifespan and reduce the need for frequent stair lift repair.
Common Electrical Mistakes to Avoid
Improper electrical setup can lead to performance issues and increased maintenance costs.
- Using overloaded circuits
- Ignoring battery replacement schedules
- Installing without surge protection
- Poor outdoor weatherproofing
- Incorrect charger placement
Avoiding these mistakes ensures a smoother installation and reduces long-term issues.
Expert Tip
Always confirm electrical compatibility before installation begins. This prevents delays and ensures the system operates safely from day one.
If you are planning installation, review our stair lift guide for full system overview, and compare options in our best stair lift brands to find models with reliable battery and charging systems.
Installation Timeline
One of the biggest advantages of stair lift installation is how quickly it can be completed. Unlike major home modifications, most installations are finished within a single day, depending on staircase type and customization level.
Understanding the timeline helps homeowners plan better and minimize disruption. Whether you are scheduling a stair lift chair installation for yourself or a family member, knowing what to expect makes the process smoother.
Typical Installation Time by Staircase Type
| Staircase Type | Estimated Installation Time | Complexity Level |
|---|---|---|
| Straight Staircase | 2–4 hours | Low |
| Curved Staircase | 4–8 hours | Medium to High |
| Outdoor Staircase | 3–5 hours | Medium |
| Custom/Complex Layout | 1 full day or more | High |
Step-by-Step Timeline Breakdown
A professional stair lift installation typically follows a structured timeline:
- Arrival and preparation of tools and components
- Final measurement confirmation
- Rail installation on staircase steps
- Motor and chair assembly
- Electrical connection and charging setup
- System testing and safety checks
- User demonstration and training
Each phase ensures the system meets stair lift installation requirements and operates safely from day one.
Pre-Installation Timeline Factors
While installation itself is fast, preparation time can vary depending on system type:
- Straight rails are often available immediately
- Curved rails require custom manufacturing (1–3 weeks)
- Outdoor systems may need weather-resistant preparation
- Complex layouts require additional planning
This means total project time may include both manufacturing and installation phases.
What Can Delay Installation?
Although most installations are straightforward, certain issues can extend the timeline:
- Incorrect measurements requiring adjustments
- Electrical setup not ready
- Obstructions on the staircase
- Custom rail delivery delays
- Unexpected structural limitations
Planning ahead reduces delays and ensures a smooth stair lift installation experience.
DIY vs Professional Installation
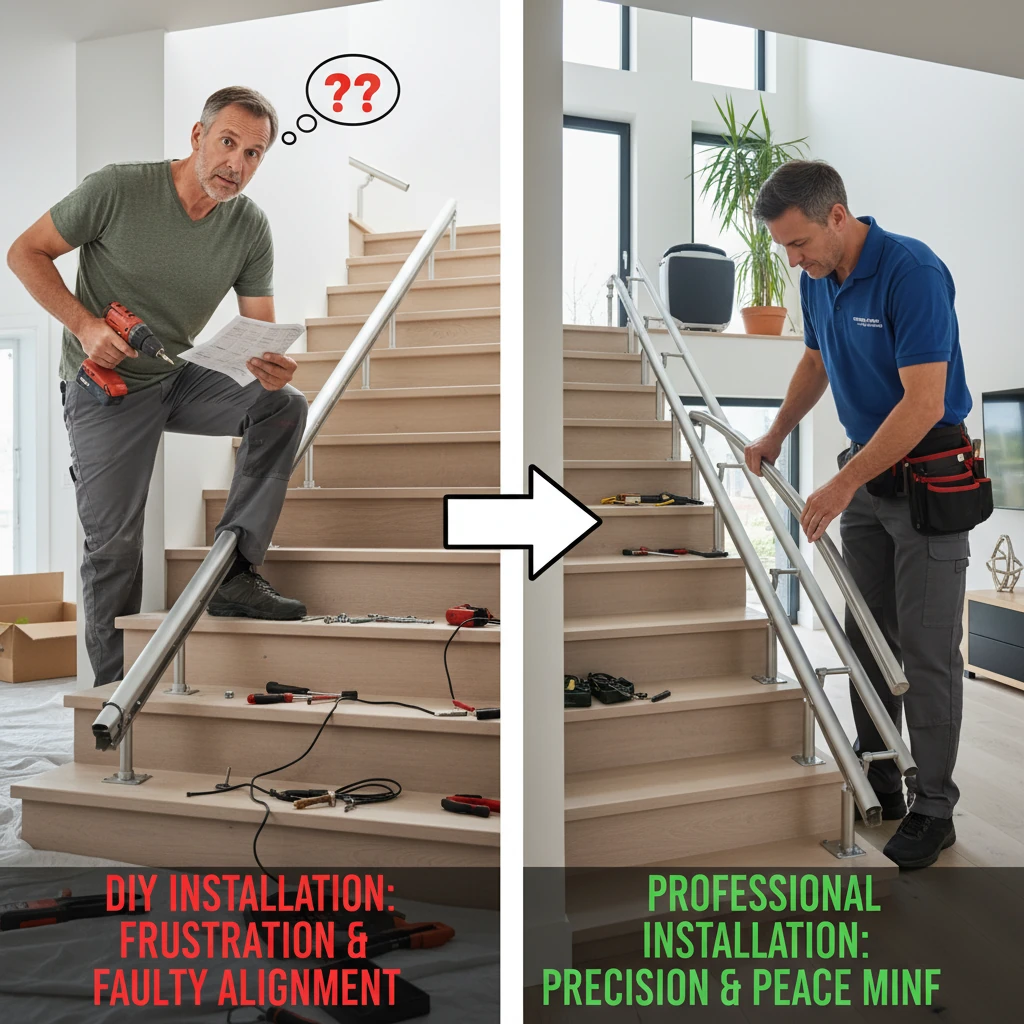
When planning a stair lift installation, many homeowners consider whether they can install the system themselves or should hire a professional. While DIY may seem cost-effective, it comes with significant risks if not done correctly.
A stair lift chair installation involves precise measurements, secure mounting, electrical setup, and safety calibration. Even small errors can affect performance, safety, and long-term reliability.
DIY Stair Lift Installation
Some manufacturers offer kits for DIY stair lift installation, usually for straight staircases. However, these installations require technical knowledge and the right tools.
- Lower upfront cost
- Suitable only for simple straight stairs
- Requires accurate measurements
- No professional safety calibration
- Higher risk of installation errors
DIY setups often lead to increased stair lift repair needs if the system is not aligned correctly.
Professional Stair Lift Installation
Professional stair lift installation is the most common and recommended option. Certified technicians ensure the system is installed safely and meets all stair lift installation requirements.
- Accurate measurements and custom fitting
- Secure rail mounting and alignment
- Proper electrical connection and setup
- Full safety testing and calibration
- User training and support
Professional installation also reduces long-term stair lift maintenance issues and improves system lifespan.
DIY vs Professional Comparison
| Factor | DIY Installation | Professional Installation |
|---|---|---|
| Cost | Lower upfront | Higher upfront |
| Safety | Risk of errors | High safety standards |
| Installation Time | Longer and uncertain | Fast and efficient |
| Accuracy | Depends on skill | Precision guaranteed |
| Warranty | May be limited | Full coverage |
| Maintenance Risk | Higher | Lower |
When DIY Might Be Suitable
DIY stair lift installation may be considered in limited situations:
- Simple straight staircase with no obstacles
- Basic system with minimal customization
- Installer has technical experience
- Budget is a primary concern
Even in these cases, careful planning is required to meet safety standards.
Why Professional Installation Is Recommended
Most homeowners choose professional installation because it ensures reliability and safety. Poor installation can lead to:
- Misaligned stairlift rails
- Increased wear on motor components
- Malfunctioning safety sensors
- Frequent stair lift repair issues
Professional installers follow strict guidelines and ensure the system operates correctly from day one.
Expert Insight
Organizations like ADA and NCOA emphasize the importance of properly installed mobility aids to reduce fall risks and improve safety. Professional installation ensures compliance with these recommendations.
If you are comparing systems before installation, review our stair lift guide for a full overview. You can also explore our stair lift cost guide to understand how installation choices affect pricing.
Common Mistakes
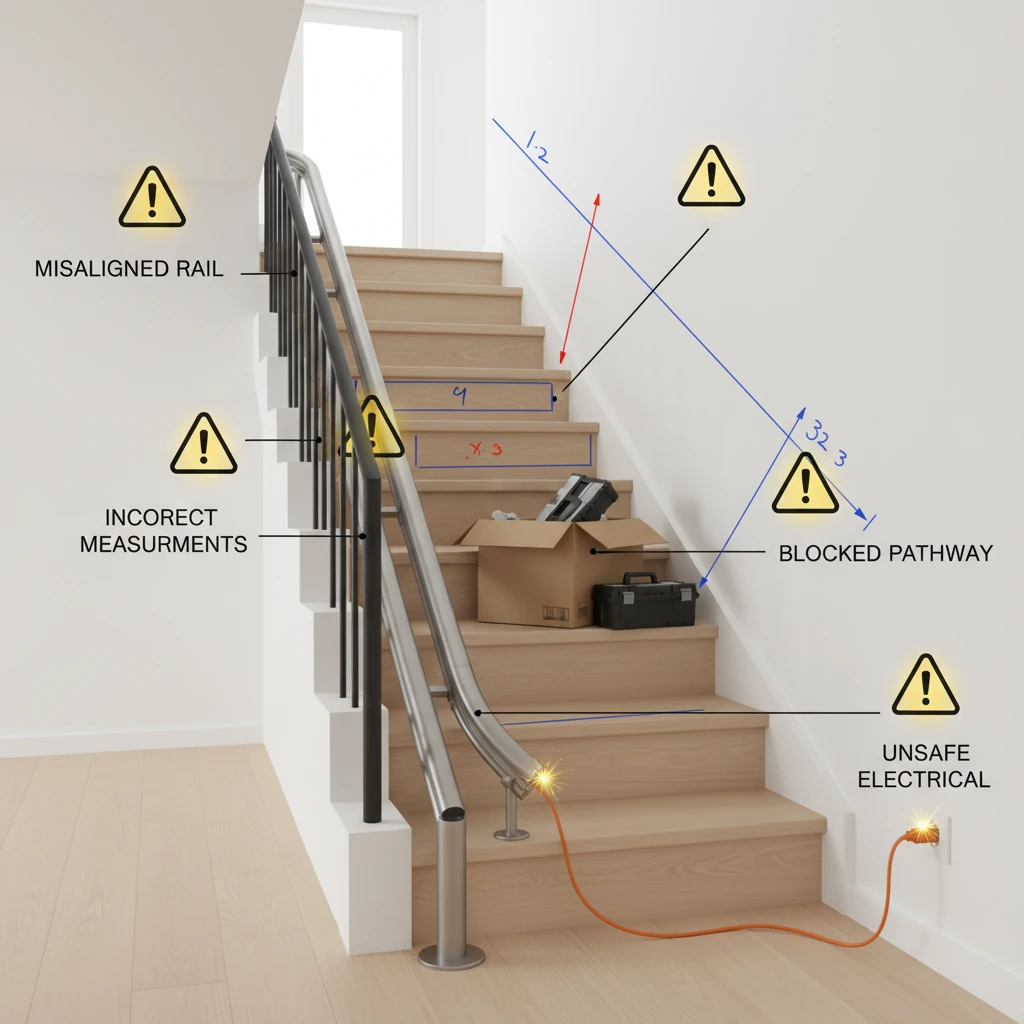
Even a well-planned stair lift installation can lead to problems if common mistakes are overlooked. Many issues reported by users are not caused by the equipment itself, but by poor planning, incorrect installation, or lack of maintenance.
Understanding these mistakes helps homeowners avoid unnecessary costs, reduce stair lift repair issues, and ensure long-term safety.
1. Incorrect Measurements
One of the most frequent errors in stair lift installation is inaccurate measurement. Even small miscalculations can lead to poor rail alignment and unsafe operation.
- Measuring straight instead of along the stairs
- Ignoring landing space
- Forgetting obstacles like doors or handrails
- Using inaccurate tools
This often results in costly adjustments or reinstallation.
2. Choosing the Wrong Stair Lift Type
Selecting the wrong system is a major mistake, especially when users do not fully understand stair lift installation requirements.
- Installing straight lifts on slightly curved stairs
- Ignoring future mobility needs
- Choosing based only on price
- Not considering weight capacity
Choosing the right system is essential for performance and long-term usability.
3. Ignoring Electrical Requirements
Overlooking electrical setup can delay installation and affect performance. A proper stair lift chair installation requires reliable power and charging points.
- No nearby power outlet
- Overloaded circuits
- Poor charger placement
- Lack of battery maintenance
These issues can reduce efficiency and increase maintenance needs.
4. Attempting Complex DIY Installation
While DIY may work for simple cases, attempting complex stair lift installation without experience can lead to serious safety risks.
- Improper rail mounting
- Incorrect alignment
- Unsafe electrical connections
- No safety calibration
This often results in frequent stair lift repair and reduced system lifespan.
5. Skipping Regular Maintenance
Neglecting stair lift maintenance is a common mistake that leads to long-term problems.
- Not checking battery condition
- Ignoring unusual noises
- Skipping annual inspections
- Not cleaning rails
Regular maintenance keeps the system running smoothly and safely.
6. Blocking Staircase Access
Poor planning can result in the lift obstructing the staircase when not in use.
- Not choosing foldable seats
- Ignoring clearance space
- Incorrect rail positioning
This can create inconvenience and reduce usability for other household members.
7. Overlooking Safety Features
Safety should always be a priority in any stair lift installation. Ignoring key features increases risk.
- No seat belt usage
- Ignoring obstacle sensors
- Skipping user training
- Not testing emergency stop functions
Modern systems include advanced safety features, but they must be used correctly.
Summary of Common Mistakes
| Mistake | Impact | Prevention |
|---|---|---|
| Incorrect measurements | Poor fit and safety risk | Use professional measurement |
| Wrong lift type | Performance issues | Match system to staircase |
| Electrical issues | Installation delays | Check power requirements |
| DIY errors | Safety hazards | Use professionals |
| No maintenance | System failure | Regular servicing |
| Blocked stairs | Reduced usability | Plan clearance space |
| Ignored safety features | Injury risk | Follow safety guidelines |
FAQs
Below are the most common questions about stair lift installation, stair lift chair installation, maintenance, and repair. These answers help clarify real concerns users have before choosing a system.
1. How long does a stair lift installation take?
A standard stair lift installation usually takes 2–4 hours for straight stairs and up to a full day for curved systems. Installation time depends on staircase complexity and customization level.
2. Can a stair lift be installed on any staircase?
Most staircases can support a stair lift, including straight, curved, and outdoor designs. However, proper assessment is needed to meet stair lift installation requirements such as width, angle, and clearance.
3. Do stair lifts require electrical work?
No major electrical work is usually required. Most systems use rechargeable batteries that charge via a standard outlet. This makes stair lift installation simple and safe in most homes.
4. What maintenance does a stair lift need?
Regular stair lift maintenance includes checking batteries, cleaning rails, and inspecting safety sensors. Annual professional servicing is recommended for long-term reliability.
5. What are common stair lift problems?
Common issues include battery wear, rail misalignment, and sensor faults. These can often be avoided with proper installation and routine stair lift maintenance.
6. Is professional installation necessary?
Yes, professional stair lift installation is strongly recommended. It ensures safety, correct alignment, and compliance with manufacturer standards, reducing long-term stair lift repair issues.
7. How much does stair lift installation cost?
Costs vary based on staircase type, model, and customization. Straight systems are more affordable, while curved installations are more expensive. See our stair lift cost guide for full details.
8. Can stair lifts be removed or relocated?
Yes, most stair lift chair installation systems can be removed or relocated. However, curved systems may require new rails if moved to a different staircase.
Conclusion
A properly planned stair lift installation is one of the most effective ways to improve home accessibility and support independent living. From accurate measurements to electrical setup and safety checks, every step plays an important role in long-term performance.
Whether you choose DIY or professional stair lift chair installation, safety should always be the top priority. Professional installation is strongly recommended to ensure compliance with stair lift installation requirements and to reduce future maintenance or repair issues.
By understanding common mistakes, installation timelines, and maintenance needs, homeowners can make informed decisions that improve safety and comfort at home. A well-installed system reduces fall risks and supports aging in place with confidence.
Before making a final decision, compare options using our stair lift guide, review pricing in the stair lift cost guide, and explore trusted options in best stair lift brands to choose the right solution for your needs.
A reliable stair lift is not just a mobility device—it is a long-term investment in safety, independence, and quality of life.